MOUNTING
The baseplate surface where the vibrator motor is mounted, has an allowable tolerance of 0.08mm, so shat the surface rests uniformly against each other to avoid internal tension, that may cause breakage of the foot of the vibrator motor.
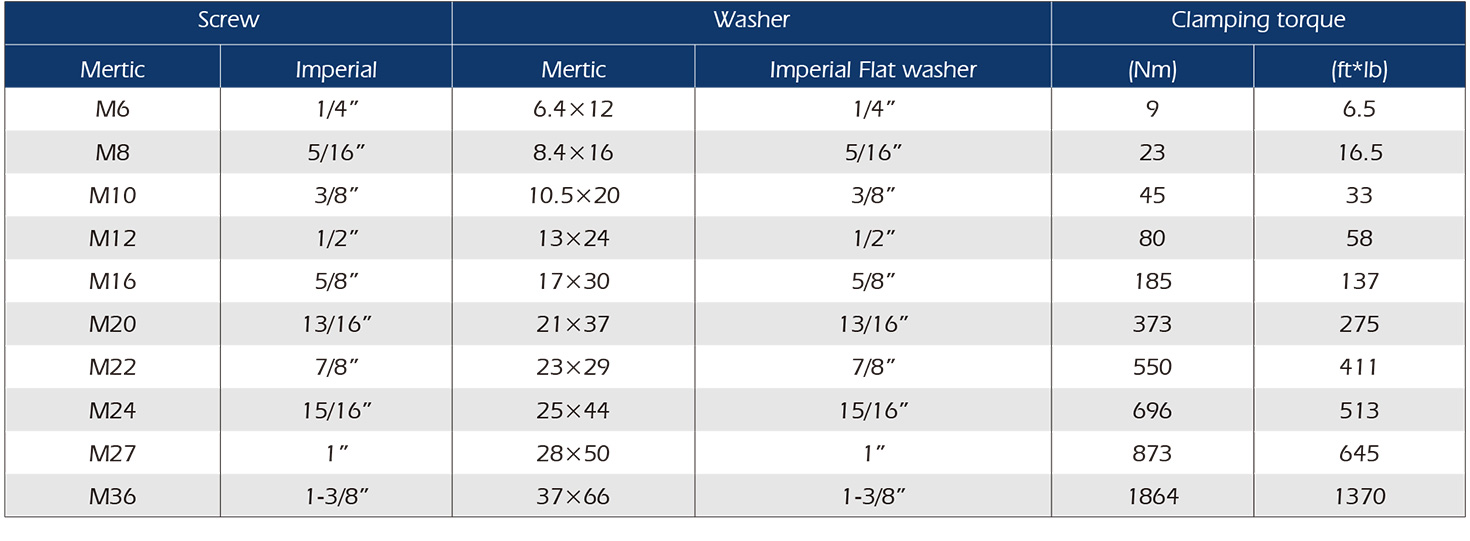
Use 8.8 class bolts, 8.0 class nuts and flat washers that belongs to category A EN ISO 7089/7092
The graph below shows the correct torque settings for the different bolt sizes used on the motor vibrators.
MOTOR / MACHINE INTERFACE
FIXING

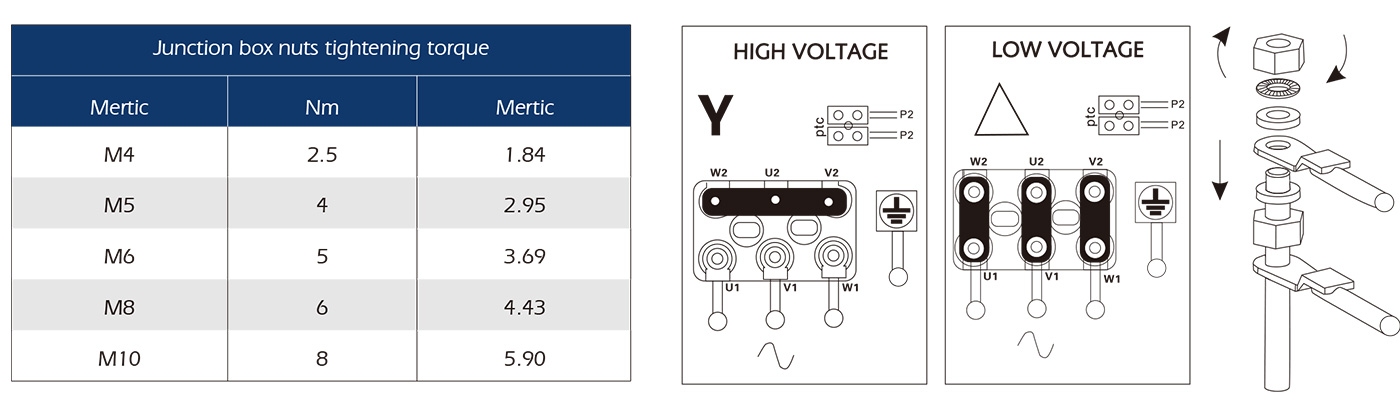
ELECTRICAL CONNECTION
Make sure the voltage and frequency supply match the ones indicated on the rating plate of the electric vibrator. Insert the power cable through the cable gland, Use only conductors that have a suitable cross-section. Connect the lead wire to the pins [ as shown in the diagram below and tighten them with the specified torque.
Do not forget to fix the earthing cable to the provided studs [ compulsory connection] !
Before closing the junction box make sure the cover gasket is properly fitted in order to keep the specified IP protection.
For more details about motor installation refer to product manuals.
OVERLOAD PROTECTION
All electic vibrators MUST be connected to a suitable external overload protection. When using two electric vibrators in sync, each of them has to be connected to an external overload protector and these overload protectors must be interlocked to make sure both motors are stopped if one fails.

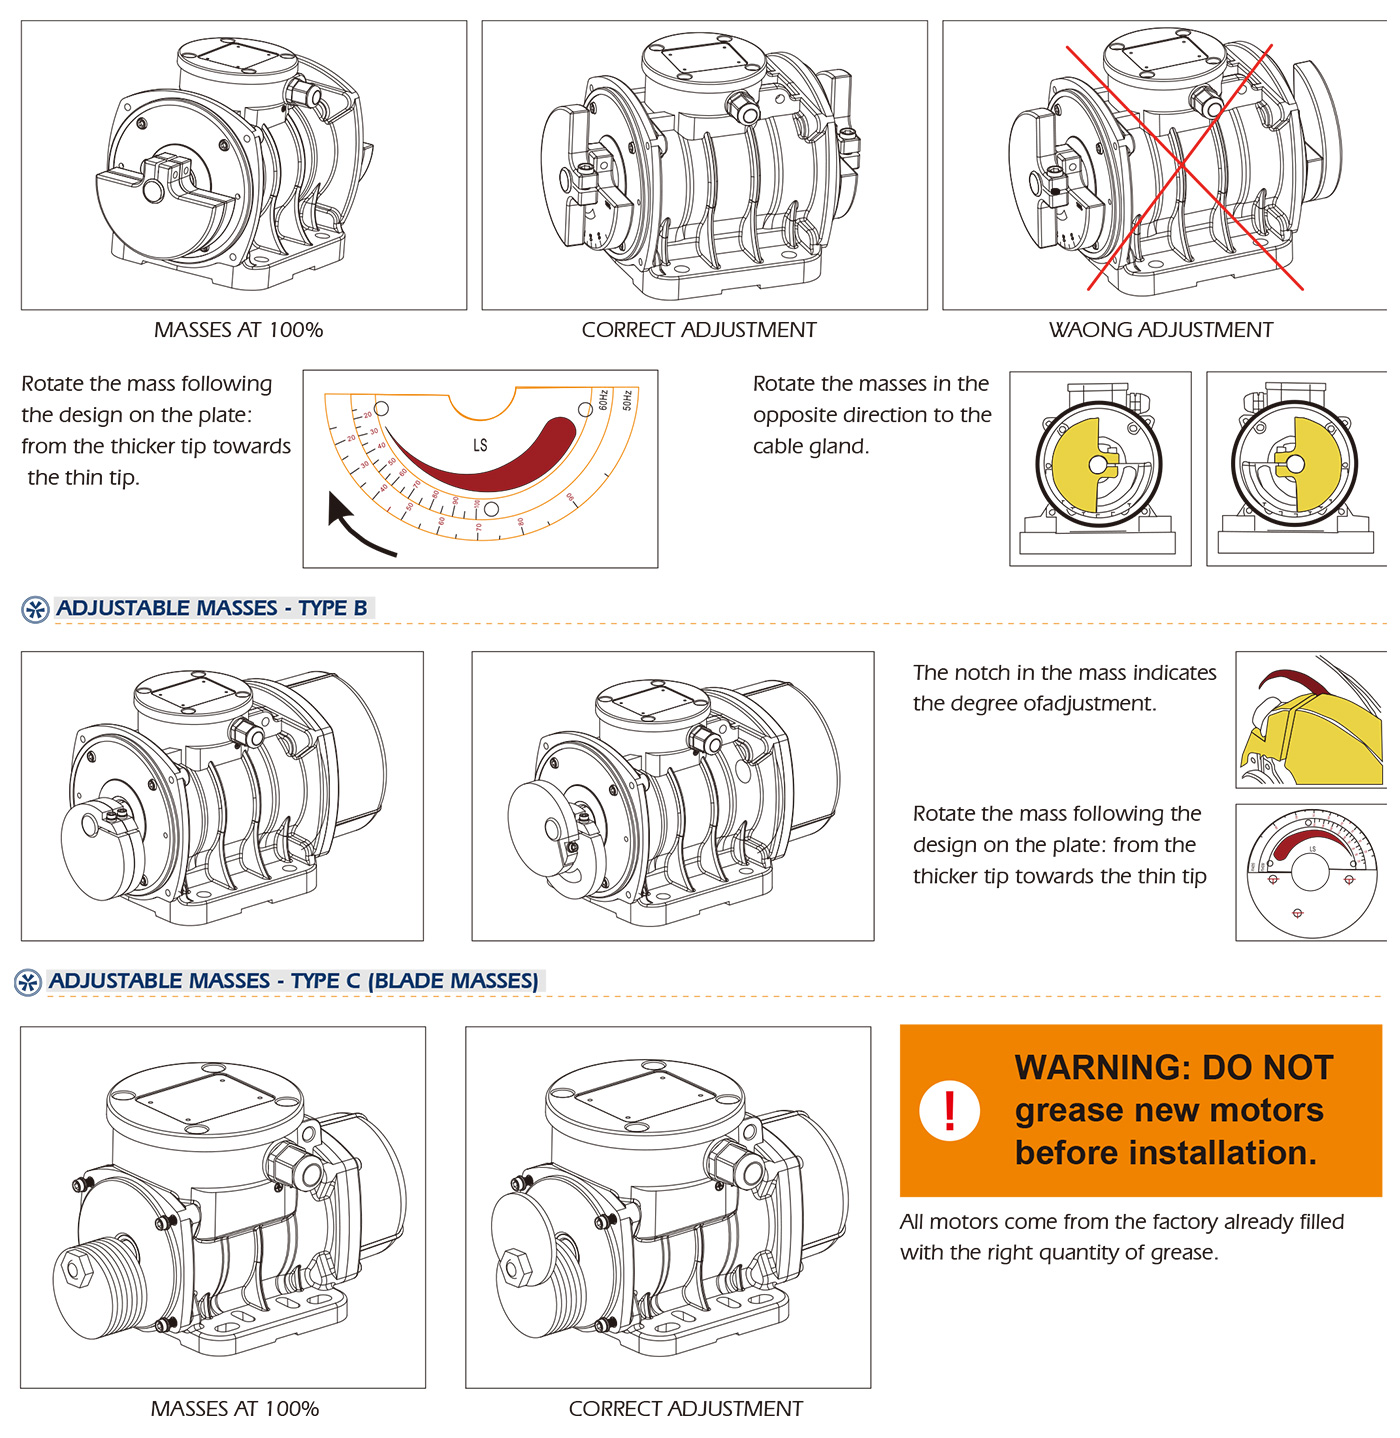
ADJUSTABLE MASSES - TYPE A

 Tel: + 86-576-86320988
 Fax: + 86-576-86333217
 E-mail: [email protected]
 Add: Dayangcheng Industrial Zone, daxi, wenling, zhejiang, china
Copyright © 2021 Zhejiang Guangling Vibrating Technology Co.,Ltd All Rights Reserved
 Custom Electric Vibrating Motors Company
 英语
英语 葡萄牙语
葡萄牙语 西班牙语
西班牙语 русский